Connect Stripe
Stripe is Statiz's most detailed revenue integration: payments land in real time through a webhook you create in your own Stripe dashboard, refunds net out automatically, and Sync now backfills up to a year of history. Setup is four steps and takes about five minutes — you create one webhook endpoint, copy one restricted API key, and paste both into Settings → Revenue.
statiz.revenue() beacon, never both, or the same payment counts twice. The provider integration is the recommended path (why).Step 1: Create the webhook
In your Stripe dashboard, open Developers → Webhooks (dashboard.stripe.com/webhooks) and click + Add endpoint. Stripe also exposes the same flow in the newer Workbench as Create an event destination — either path works.
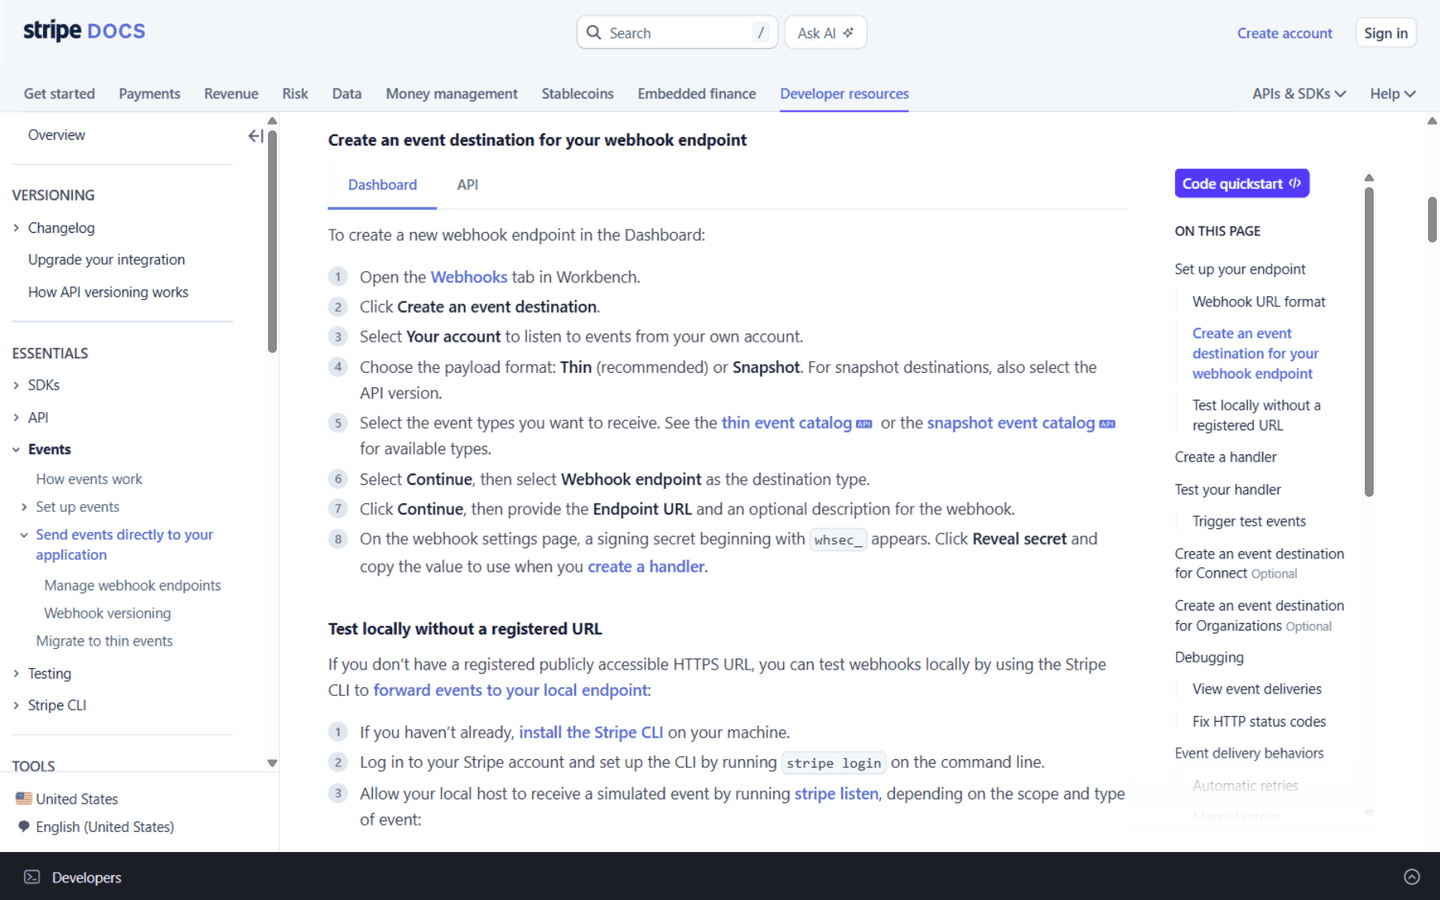
- Paste the Endpoint URL shown in Statiz under Settings → Revenue → Connect Stripe — it looks like
https://your-statiz-url/api/webhooks/stripe/{your site id}. Statiz must be reachable at a public URL (localhost can't receive webhooks — deploy first or use a tunnel). - Under Events, select exactly these two:
charge.succeeded— a payment (a positive revenue row)charge.refunded— a refund (a negative row that nets the payment out)
- Click Add endpoint, then open the new endpoint and click Click to reveal next to Signing secret. Copy the
whsec_…value — you'll paste it in Step 3.
Step 2: Copy your API key
Open Developers → API keys (dashboard.stripe.com/apikeys) and create a restricted key (the rk_… kind) with Read permission on:
- Balance — used to verify the key at connect
- Charges — the “Sync now” backfill reads your payment history
- Refunds — the backfill's refund rows
- Optional: Payment Intents read — lets Statiz pick up the visitor attribution hint Stripe stamps on Checkout Sessions created with
metadata.statz_visitor_id
A restricted key can only read — Statiz never moves money, creates charges, or writes anything to your Stripe account.
rk_live_/sk_live_ — Statiz accepts live keys only, so the numbers on your dashboard are the money your site actually made.Step 3: Connect in Statiz
Open your website in Statiz, go to Settings → Revenue, pick Stripe as the provider (the guide card shows this exact URL and event list for your site), then paste the restricted key and the whsec_… signing secret and click Connect.
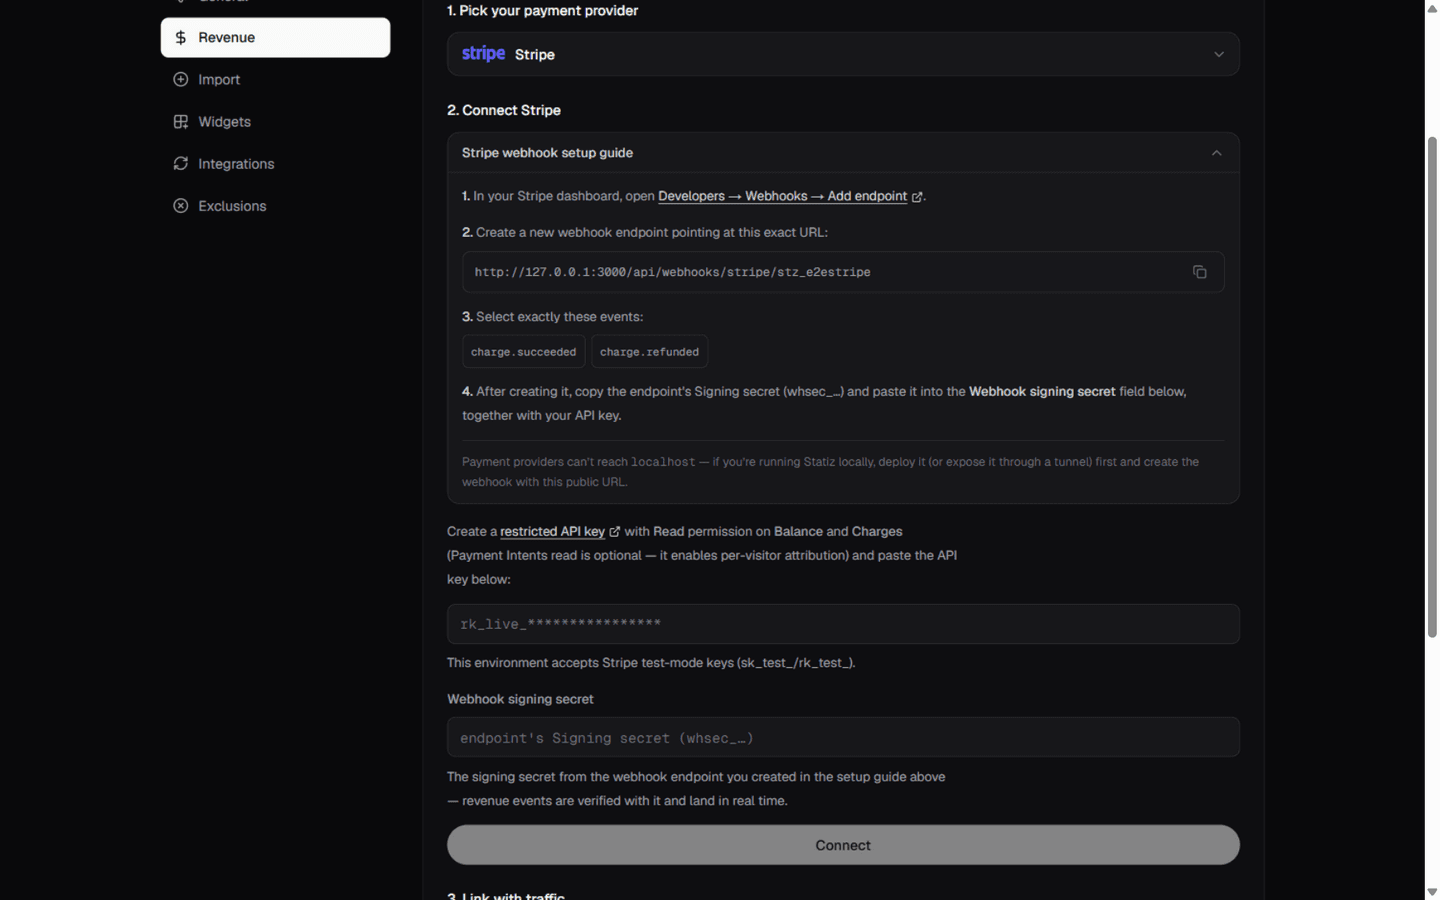
Statiz verifies the key against Stripe's API (a balance read), encrypts both values with AES-256-GCM, and stores them — the raw key is never logged or shown again. The card then flips to the connected state with your Stripe business name and mode.
Step 4: Sync and verify
Click Sync now once connected. The first sync backfills your payment history from Stripe's API — up to 365 days, never just from the moment you connected — and reports how many transactions were imported. Every later payment and refund arrives in real time through the webhook, usually within seconds.
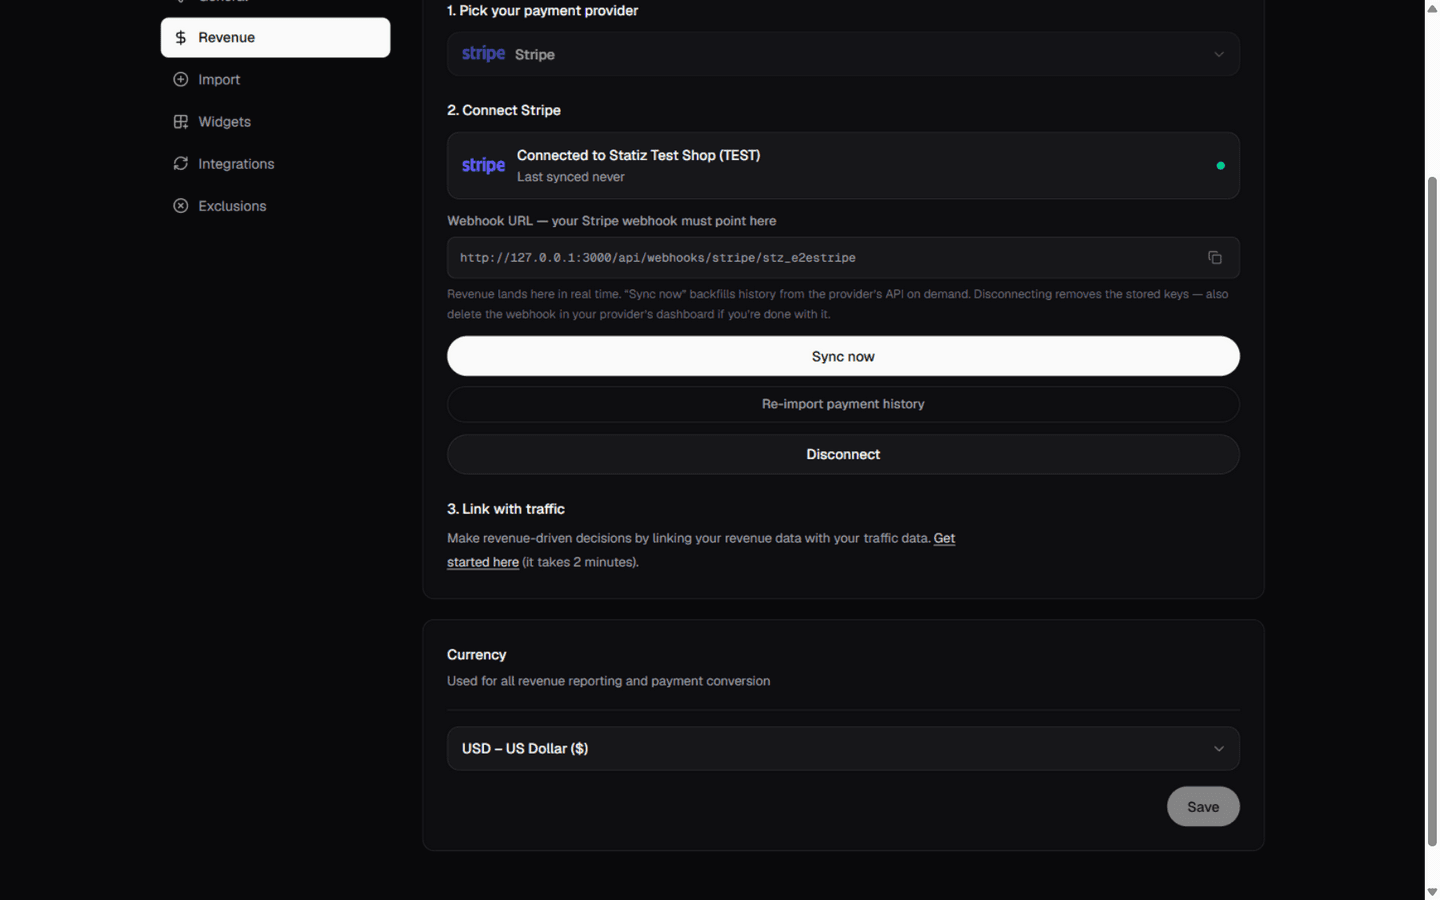
To verify the webhook end-to-end, make a test payment (or send a test event from the Stripe dashboard's webhook page) and watch the Revenue tile on the dashboard jump. Duplicate deliveries are harmless — every transaction is stored under a unique Stripe id, so nothing is ever counted twice.
Notes & caveats
- Refunds land as negative amounts, so revenue and every payer's Spent net out automatically — including partial refunds.
- To attribute payments to tracked visitors, stamp
metadata.statz_visitor_idinto your Checkout Session — the full recipe is in Link payments to visitors. - Stripe retries failed deliveries for up to three days; Statiz acknowledges everything it processed, so retries are always safe.
- Disconnecting removes the stored key and secret — also delete the endpoint in Stripe's dashboard if you're done with it.